ADCのテクニカルノートTN2137 には、configure 系ソースコードツリーのユニバーサルバイナリのビルド方法が説明されているが、実際にやってみると、configure はもとよりその他様々な Unix 系ソースコードツリーのユニバーサルバイナリのビルド&インストール方法としてはかなり不十分である。
いくつか代表的な例を用いて、ユニバーサルバイナリのビルド&インストール方法の実際を紹介しよう。
configure 系、シングルステージ
readline-6.1 での例
Tiger でも動作するようなユニバーサルバイナリを構築してみよう。
ub32_64_flags='-arch ppc -arch ppc64 -arch i386 -arch x86_64'
tiger_flags='-isysroot /Developer/SDKs/MacOSX10.4u.sdk -mmacosx-version-min=10.4'
./configure\
 "CFLAGS=$ub32_64_flags $tiger_flags"\
 "LDFLAGS=ub32_64_flags $tiger_flags"\
 --prefix=/opt/local &&
make
インストールについてはいつも通り、sudo make install すればよい。
これは珍しく --disable-dependency-tracking オプションが不要な例である。大抵は、次の例のように必要になる。
sed-4.2 での例
大抵の場面では、configure のオプションに --disable-dependency-tracking オプションが必要になる。
ub32_64_flags='-arch ppc -arch ppc64 -arch i386 -arch x86_64'
tiger_flags='-isysroot /Developer/SDKs/MacOSX10.4u.sdk -mmacosx-version-min=10.4'
./configure --disable-dependency-tracking\
 "CFLAGS=$ub32_64_flags $tiger_flags"\
 "CXXFLAGS=$ub32_64_flags $tiger_flags"\
 "LDFLAGS=ub32_64_flags $tiger_flags"\
 --prefix=/opt/local &&
make
ちなみに、Snow Leopard での標準の gcc では -isysroot の代わりに -isystem を使う。
g++ もビルドに使用されるなら、CXXCFLAGS も CLAGS と同様に configure に渡す必要がある。Fortran についてはユニバーサルバイナリに対応した fort77 を使用して、FFLAGS も CLAGS と同様に configure に渡す必要がある。
gd-2.0.35 での例
稀に LDFLAGS の定義が反映されない configure が存在する。その場合、CC にアーキテクチャに関するフラグを設定するほかないが、すると CPP がおかしくなってビルドできないことが多いので、CPP も別途定義する。例えば以下のように行う。
ub32_flags='-arch ppc -arch i386'
tiger_flags='-isysroot /Developer/SDKs/MacOSX10.4u.sdk -mmacosx-version-min=10.4'
with_tiger_flags='-iwithsysroot /Developer/SDKs/MacOSX10.4u.sdk'
x_tiger_flags='-I/Developer/SDKs/MacOSX10.4u.sdk/usr/X11R6/include -L/Developer/SDKs/MacOSX10.4u.sdk/usr/X11R6/lib -iwithsysroot /Developer/SDKs/MacOSX10.4u.sdk'
x_configure_tiger_flags='--x-includes=/Developer/SDKs/MacOSX10.4u.sdk/usr/X11R6/include --x-libraries=/Developer/SDKs/MacOSX10.4u.sdk/usr/X11R6/lib'
./configure --disable-dependency-tracking\
 CC="gcc $ub32_flags $tiger_flags $with_tiger_flags -I/opt/local/include $x_tiger_flags"\
 CPP="gcc -E $tiger_flags $with_tiger_flags -I/opt/local/include $x_tiger_flags"\
 CXX="g++ $ub32_flags $tiger_flags $with_tiger_flags -I/opt/local/include $x_tiger_flags"\
 CXXCPP="g++ -E $tiger_flags $with_tiger_flags -I/opt/local/include\
 $x_tiger_flags"\
 --prefix=/opt/local --with-x &&
make
g++ もビルドに使用されるなら、CXXCPP も CPP と同様に configure に渡す必要がある。
また、このように、Tiger に対応した X11 を使用するものの場合、-iwithsysroot とともに /Developer/SDKs/MacOSX10.4u.sdk/usr/X11R6/* にヘッダパスやライブラリパスを指定する必要がある。
configure 系、マルチステージ
gmp-4.3.2 での例
シングルステージではうまくビルドできないソースコードツリーが多い。それは、configure 時にアーキテクチャが決定され、依存関係がそれによって変わってしまう類いである。その場合、クロスコンパイルを複数回繰り返し、最終的に lipo コマンドでバイナリを統合する必要がある。
それだけでは済まない場合も稀にある。それは、configure 時にヘッダファイルが作成され、それがアーキテクチャによって変わってしまう場合である。その場合、lipo によるバイナリの統合だけでなく、ヘッダファイルも統合する必要がある。
listup_binaries(){
  find . -type f | while read o; do
    case "$o" in
    ./.arch_*/*) continue;;
    *)
      t="`file -b \"$o\"`"
      case "$t" in
      *"Mach-O"*" executable"*);;
      *"current ar archive"*|*"ar archive random library"*);;
      *"Mach-O"*" dynamically linked shared library"*);;
      *"Mach-O"*" object"*);;
      *"Mach-O"*" bundle"*);;
      *) continue;;
      esac
      ;;
    esac
    echo "$o"
  done
}
listup_headers(){
  find . -type f | while read o; do
    case "$o" in
    ./.arch_/*) continue;;
    *.h|*.hpp|*.hh|*.inc)
      t="`file -b \"$o\"`"
      case "$t" in
      *"program text"*);;
      *) continue;;
      esac
      ;;
    *) continue;;
    esac
    echo "$o"
  done
}
tiger_flags='-isysroot /Developer/SDKs/MacOSX10.4u.sdk -mmacosx-version-min=10.4'
#make clean distclean &&
./configure ABI=64\
 "CFLAGS=-arch x86_64 $tiger_flags"\
 "CXXFLAGS=-arch x86_64 $tiger_flags"\
 "LDFLAGS=-arch x86_64 $tiger_flags"\
 --host=x86_64-apple-darwin --build=`sh config.guess` --prefix=/opt/local --enable-cxx --enable-mpbsd &&
make &&
{ make check || true; } &&
{
  [ -d .arch_x86_64 ] || mkdir .arch_x86_64 &&
  listup_binaries > .arch_x86_64/.binaries.lst && tar --files-from=.arch_x86_64/.binaries.lst -cf - | (cd .arch_x86_64 && tar xf -) &&
  listup_headers > .arch_x86_64/.headers.lst && tar --files-from=.arch_x86_64/.headers.lst -cf - | (cd .arch_x86_64 && tar xf -)
} &&
make clean distclean &&
./configure ABI=32\
 "CFLAGS=-arch i386 $tiger_flags"\
 "CXXFLAGS=-arch i386 $tiger_flags"\
 "LDFLAGS=-arch i386 $tiger_flags"\
 --host=i386-apple-darwin --build=`sh config.guess` --prefix=/opt/local --enable-cxx --enable-mpbsd &&
make &&
{ make check || true; } &&
{
  [ -d .arch_i386 ] || mkdir .arch_i386 &&
  listup_binaries > .arch_i386/.binaries.lst && tar --files-from=.arch_i386/.binaries.lst -cf - | (cd .arch_i386 && tar xf -) &&
  listup_headers > .arch_i386/.headers.lst && tar --files-from=.arch_i386/.headers.lst -cf - | (cd .arch_i386 && tar xf -)
} &&
make clean distclean &&
./configure ABI=mode64\
 "CFLAGS=-arch ppc64 $tiger_flags"\
 "CXXFLAGS=-arch ppc64 $tiger_flags"\
 "LDFLAGS=-arch ppc64 $tiger_flags"\
 --host=ppc64-apple-darwin --build=`sh config.guess` --prefix=/opt/local --enable-cxx --enable-mpbsd &&
make &&
{ make check || true; } &&
{
  [ -d .arch_ppc64 ] || mkdir .arch_ppc64 &&
  listup_binaries > .arch_ppc64/.binaries.lst && tar --files-from=.arch_ppc64/.binaries.lst -cf - | (cd .arch_ppc64 && tar xf -) &&
  listup_headers > .arch_ppc64/.headers.lst && tar --files-from=.arch_ppc64/.headers.lst -cf - | (cd .arch_ppc64 && tar xf -)
} &&
make clean distclean &&
./configure ABI=32\
 "CFLAGS=-arch ppc $tiger_flags"\
 "CXXFLAGS=-arch ppc $tiger_flags"\
 "LDFLAGS=-arch ppc $tiger_flags"\
 --host=ppc-apple-darwin --build=`sh config.guess` --prefix=/opt/local --enable-cxx --enable-mpbsd &&
make &&
{ make check || true; } &&
{
  [ -d .arch_ppc ] || mkdir .arch_ppc &&
  listup_binaries > .arch_ppc/.binaries.lst && tar --files-from=.arch_ppc/.binaries.lst -cf - | (cd .arch_ppc && tar xf -) &&
  listup_headers > .arch_ppc/.headers.lst && tar --files-from=.arch_ppc/.headers.lst -cf - | (cd .arch_ppc && tar xf -)
} &&
{
  cat .arch_ppc/.headers.lst | while read h; do
    diff .arch_ppc/"$h" .arch_ppc64/"$h" > /dev/null 2>&1 &&
    diff .arch_ppc/"$h" .arch_i386/"$h" > /dev/null 2>&1 &&
    diff .arch_ppc/"$h" .arch_x86_64/"$h" > /dev/null 2>&1 || {
      echo univarsalized header: "$h"
      cat <<EOF > "$h" &&
#if defined(__ppc__)

`cat .arch_ppc/"$h"`

#elif defined(__ppc64__)

`cat .arch_ppc64/"$h"`

#elif defined(__i386__)

`cat .arch_i386/"$h"`

#elif defined(__x86_64__)

`cat .arch_x86_64/"$h"`

#endif /* defined(__arch__) */
EOF
      touch -r .arch_ppc/"$h" "$h"
    }
  done
} &&
{
  listup_binaries | while read o; do
    echo lipo -create -output "$o" -arch ppc .arch_ppc/"$o" -arch ppc64 .arch_ppc64/"$o" -arch i386 .arch_i386/"$o" -arch x86_64 .arch_x86_64/"$o"
    lipo -create -output "$o" -arch ppc .arch_ppc/"$o" -arch ppc64 .arch_ppc64/"$o" -arch i386 .arch_i386/"$o" -arch x86_64 .arch_x86_64/"$o" &&
    touch -r .arch_ppc/"$o" "$o"
  done
}
ちなみに、ABI= は gmp における固有の定義である。
ここでのポイントは、touch -r を利用して、依存関係を崩さずに lipo で統合している事にある。よって、インストールについてはいつも通り、sudo make installすればよい。
これでもうまく行かない場合が稀にある。その原因は make install 時にアーキテクチャに依存したビルドが実行されてしまう次のような場合である。
octave-3.2.4 での例
make install 時にアーキテクチャに依存したビルドが実行されてしまう場合には、各ステージ毎に make install をどこか他の場所へ行い、後にそれらを統合する必要がある。但し、make DESTDIR=destdir install に対応した configure もしくは Makefile が生成されている事が前提条件となる。
listup_binaries(){
  find . -type f | while read o; do
    case "$o" in
    ./.arch_*/*) continue;;
    *)
      t="`file -b \"$o\"`"
      case "$t" in
      *"Mach-O"*" executable"*);;
      *"current ar archive"*|*"ar archive random library"*);;
      *"Mach-O"*" dynamically linked shared library"*);;
      *"Mach-O"*" object"*);;
      *"Mach-O"*" bundle"*);;
      *) continue;;
      esac
      ;;
    esac
    echo "$o"
  done
}
listup_headers(){
  find . -type f | while read o; do
    case "$o" in
    ./.arch_*/*) continue;;
    *.h|*.hpp|*.hh|*.inc)
      t="`file -b \"$o\"`"
      case "$t" in
      *"program text"*);;
      *) continue;;
      esac
      ;;
    *) continue;;
    esac
    echo "$o"
  done
}
tiger_flags='-isysroot /Developer/SDKs/MacOSX10.4u.sdk -mmacosx-version-min=10.4'
with_tiger_flags='-iwithsysroot /Developer/SDKs/MacOSX10.4u.sdk'
x_configure_tiger_flags='--x-includes=/Developer/SDKs/MacOSX10.4u.sdk/usr/X11R6/include --x-libraries=/Developer/SDKs/MacOSX10.4u.sdk/usr/X11R6/lib'
#make clean distclean &&
./configure --enable-static\
 "CFLAGS=-arch i386 $tiger_flags $with_tiger_flags"\
 "CXXFLAGS=-arch i386 $tiger_flags $with_tiger_flags"\
 CPPFLAGS=-I/opt/local/include\
 "FFLAGS=-arch i386 $tiger_flags $with_tiger_flags"\
 "LDFLAGS=-L/opt/local/lib -arch i386 $tiger_flags $with_tiger_flags"\
 "FLIBS=-L/opt/local/lib -lf2c"\
 x_configure_tiger_flags --prefix=/opt/local &&
make &&
make DESTDIR=`pwd` install &&
{
  [ -d .arch_i386 ] || mkdir .arch_i386 &&
  listup_binaries > .arch_i386/.binaries.lst && tar --files-from=.arch_i386/.binaries.lst -cf - | (cd .arch_i386 && tar xf -) &&
  listup_headers > .arch_i386/.headers.lst && tar --files-from=.arch_i386/.headers.lst -cf - | (cd .arch_i386 && tar xf -)
} &&
make clean distclean &&
./configure --enable-static\
 "CFLAGS=-arch ppc $tiger_flags $with_tiger_flags"\
 "CXXFLAGS=-arch ppc $tiger_flags $with_tiger_flags"\
 CPPFLAGS=-I/opt/local/include\
 "FFLAGS=-arch ppc $tiger_flags $with_tiger_flags"\
 "LDFLAGS=-L/opt/local/lib -arch ppc $tiger_flags $with_tiger_flags"\
 "FLIBS=-L/opt/local/lib -lf2c"\
 x_configure_tiger_flags --prefix=/opt/local &&
make &&
make DESTDIR=`pwd` install &&
{
  [ -d .arch_ppc ] || mkdir .arch_ppc &&
  listup_binaries > .arch_ppc/.binaries.lst && tar --files-from=.arch_ppc/.binaries.lst -cf - | (cd .arch_ppc && tar xf -) &&
  listup_headers > .arch_ppc/.headers.lst && tar --files-from=.arch_ppc/.headers.lst -cf - | (cd .arch_ppc && tar xf -)
} &&
{
  cat .arch_ppc/.headers.lst | while read h; do
    diff .arch_ppc/"$h" .arch_i386/"$h" > /dev/null 2>&1 || {
      echo univarsalized header: "$h"
      cat <<EOF > "$h" &&
#if defined(__ppc__) || defined(__ppc64__)

`cat .arch_ppc/"$h"`

#elif defined(__i386__) || defined(__x86_64__)

`cat .arch_i386/"$h"`

#endif /* defined(__arch__) */
EOF
      touch -r .arch_ppc/"$h" "$h"
    }
  done
} &&
{
  listup_binaries | while read o; do
    echo lipo -create -output "$o" -arch ppc .arch_ppc/"$o" -arch i386 .arch_i386/"$o"
    lipo -create -output "$o" -arch ppc .arch_ppc/"$o" -arch i386 .arch_i386/"$o" &&
    touch -r .arch_ppc/"$o" "$o"
  done
}
この場合、make install は使えない。./opt/local に配置されたファイルツリーを /opt/local にコピーすればよいはずだが、実はそれではうまくいかない。なぜなら、インストール時に /opt/local に既存のファイルを変更するような場合、ただコピーしただけでは、既存のファイルから情報を削除してしまうことになるからである。
よって、この場合は以下のようにインストールを行う。
chown -R root:admin opt/local/
find opt/local/ \( ! -type d -o \( -type d \( -empty -o ! -perm u+w,a+rx \) \) \) ! -regex '.*/info/dir$' ! -name charset.alias ! -name locale.alias > .installed.lst
touch `cat .installed.lst`
tar --no-recursion --files-from=.installed.lst -cf - | tar -C / --no-recursion -xf -
install-info --info-dir=/opt/local/share/info /opt/local/share/info/octave.info
既存のファイルが変更されるようなものとして、info/dir, charset.alias, locale.alias があり、それを除外してコピーしている。加えて、除外された info/dir を本来のインストールのされ方に則ってインストールしている。
cmake 系
cmake によるビルド&インストールが用意されているものは、比較的簡単にユニバーサルバイナリのビルド&インストールができる。
OpenCV-2.1.0 での例
cmake . で生成される CMakeCache.txt を make edit_cache で編集してもよいが、CMakeCache.txt を参考に、以下のように行う。
cmake . -DCMAKE_INSTALL_PREFIX:STRING=/opt/local -DBUILD_NEW_PYTHON_SUPPORT:BOOL=OFF\
 -DCMAKE_OSX_ARCHITECTURES:STRING="ppc;i386;" -DCMAKE_OSX_DEPLOYMENT_TARGET:STRING=10.4 -DCMAKE_OSX_SYSROOT:PATH=/Developer/SDKs/MacOSX10.4u.sdk\
 -DENABLE_SSE:BOOL=OFF -DENABLE_SSE2:BOOL=OFF -DWITH_CARBON:BOOL=ON -DWITH_QUICKTIME:BOOL=ON
make VERBOSE=:
インストールは make install でよい。もしうまくいかなければ、先に紹介したマルチステージの方法も使える。
Imakefile 系
X Window System の Imakefile から xmkmf -a で Makefile を作成する類いは、既にレガシーなものが多いが、ユニバーサルバイナリのビルド&インストールはそれほど難しくない。
tgif-QPL-4.2.2 での例
ub32_flags='-arch ppc -arch i386'
x_tiger_flags='-I/Developer/SDKs/MacOSX10.4u.sdk/usr/X11R6/include -L/Developer/SDKs/MacOSX10.4u.sdk/usr/X11R6/lib -iwithsysroot /Developer/SDKs/MacOSX10.4u.sdk'
tiger_flags='-isysroot /Developer/SDKs/MacOSX10.4u.sdk -mmacosx-version-min=10.4'
xmkmf &&
make Makefiles &&
make "CC=gcc $ub32_flags $x_tiger_flags $tiger_flags'
インストールは通常通り make install install.man でよい。もしうまくいかなければ、先に紹介したマルチステージの方法も使える。
但し、Snow Leopard には xmkmf および imake 関係がバッサリ削除されているので、Imakefile 系のものをビルド&インストールすることはできない。X.org から xmkmf 関係を導入するのも一考だが、それよりも Imakefile 自体が廃れつつあるので、configure 系への移行を検討すべきだろう。
Makefile 系
configure でもない、cmake でもない、Imakefile でもない、単に Makefile が用意されているものは、それぞれでマチマチである。ただ、小規模のソースコードツリーであることが多いので、Makefile や付属のドキュメントを良く読めば、それほど難しくなくユニバーサルバイナリのビルド&インストールが出来る。
getopt-1.1.4 での例
ub32_flags='-arch ppc -arch i386'
tiger_flags='-isysroot /Developer/SDKs/MacOSX10.4u.sdk -mmacosx-version-min=10.4'
make prefix=/opt/local LIBCGETOPT=0 "CC=gcc $ub32_flags $tiger_flags -I/opt/local/include' -LDFLAGS=-L/opt/local/lib -lintl"
インストールは以下のように行う。
make prefix=/opt/local install install_doc
その他
それでもユニバーサルバイナリがビルドできない、ビルド&インストールが成功しても正しく動かないものも存在する。
その場合は、ppc 用を /opt/local/ppc 配下に、i386 用を /opt/local/x86 配下にビルド&インストールする他無い。そのようにした上で、/opt/local/bin にユーザに統合したコマンドを提供すれば、ユーザはそうしたことを意識せずに利用することができる。
ppc 用、i386 用をそれぞれ /opt/local/{ppc,x86} 配下にビルド&インストールしたのち、この方法 で /opt/local 配下に統合している。
ppc 用、i386 用をそれぞれ /opt/local/{ppc,x86} 配下にビルド&インストールしたのち、この方法 で /opt/local 配下に統合している。
バイナリを確認する
生成されたりインストールされたバイナリがユニバーサルなのか、適切なライブラリに依存しているかどうか、インストールに先立ち確認しなければならない。それには、file コマンドや otool -L コマンドを利用する事になるが、ソースコードツリー内やインストール先でそれをうまく利用するには一工夫必要である。
バイナリがユニバーサルバイナリかどうかを確認
file コマンドを利用すればよいが、どのファイルがバイナリファイルなのかがわからないと、確認するのに一苦労である。よって、拙作 make-logging-*.tar.bz2 内の binaries-file.sh スクリプトを利用するとよい。
qhull-2010.1$ binaries-file.sh .
        :
./src/libqhull.5.0.0.dylib: Mach-O universal binary with 4 architectures
./src/libqhull.5.0.0.dylib (for architecture ppc):     Mach-O dynamically linked shared library ppc
./src/libqhull.5.0.0.dylib (for architecture ppc64):        Mach-O 64-bit dynamically linked shared library ppc64
./src/libqhull.5.0.0.dylib (for architecture i386):   Mach-O dynamically linked shared library i386
./src/libqhull.5.0.0.dylib (for architecture x86_64):      Mach-O 64-bit dynamically linked shared library x86_64
        :
./src/qhull: Mach-O universal binary with 4 architectures
./src/qhull (for architecture ppc):     Mach-O executable ppc
./src/qhull (for architecture ppc64): Mach-O 64-bit executable ppc64
./src/qhull (for architecture i386):    Mach-O executable i386
./src/qhull (for architecture x86_64):      Mach-O 64-bit executable x86_64
        :
インストールされたファイルリストを保持していたのなら、拙作 make-logging-*.tar.bz2 内の installed-binaries-file.sh スクリプトを利用するとよい。
$ installed-binaries-file.sh qhull-2010.1-ubagami.installed
        :
/opt/local/bin/qhull: Mach-O universal binary with 4 architectures
/opt/local/bin/qhull (for architecture ppc):    Mach-O executable ppc
/opt/local/bin/qhull (for architecture ppc64):       Mach-O 64-bit executable ppc64
/opt/local/bin/qhull (for architecture i386):  Mach-O executable i386
/opt/local/bin/qhull (for architecture x86_64):     Mach-O 64-bit executable x86_64
        :
/opt/local/lib/libqhull.5.0.0.dylib: Mach-O universal binary with 4 architectures
/opt/local/lib/libqhull.5.0.0.dylib (for architecture ppc):     Mach-O dynamically linked shared library ppc
/opt/local/lib/libqhull.5.0.0.dylib (for architecture ppc64):        Mach-O 64-bit dynamically linked shared library ppc64
/opt/local/lib/libqhull.5.0.0.dylib (for architecture i386):   Mach-O dynamically linked shared library i386
/opt/local/lib/libqhull.5.0.0.dylib (for architecture x86_64):      Mach-O 64-bit dynamically linked shared library x86_64
        :
バイナリがどのライブラリに依存しているかを確認
otool -L コマンドを利用すればよいが、どのファイルがバイナリファイルなのかがわからないと、確認するのに一苦労である。よって、拙作 make-logging-*.tar.bz2 内の binaries-ldd.sh スクリプトを利用するとよい。
qhull-2010.1$ binaries-ldd.sh .
        :
./src/libqhull.5.0.0.dylib:
        /Users/taiji/import/local/science/octave/qhull-2010.1/src/libqhull.5.dylib (compatibility version 5.0.0, current version 5.0.0)
        /usr/lib/libSystem.B.dylib (compatibility version 1.0.0, current version 88.3.10)
        /usr/lib/libgcc_s.1.dylib (compatibility version 1.0.0, current version 1.0.0)
        :
./src/qhull:
        /Users/taiji/import/local/science/octave/qhull-2010.1/src/libqhull.5.dylib (compatibility version 5.0.0, current version 5.0.0)
        /usr/lib/libSystem.B.dylib (compatibility version 1.0.0, current version 88.3.10)
        /usr/lib/libgcc_s.1.dylib (compatibility version 1.0.0, current version 1.0.0)
        :
インストールされたファイルリストを保持していたのなら、拙作 make-logging-*.tar.bz2 内の installed-binaries-ldd.sh スクリプトを利用するとよい。
$ installed-binaries-ldd.sh qhull-2010.1-ubagami.installed
        :
./src/libqhull.5.0.0.dylib:
        /Users/taiji/import/local/science/octave/qhull-2010.1/src/libqhull.5.dylib (compatibility version 5.0.0, current version 5.0.0)
        /usr/lib/libSystem.B.dylib (compatibility version 1.0.0, current version 88.3.10)
        /usr/lib/libgcc_s.1.dylib (compatibility version 1.0.0, current version 1.0.0)
        :
./src/qhull:
        /Users/taiji/import/local/science/octave/qhull-2010.1/src/libqhull.5.dylib (compatibility version 5.0.0, current version 5.0.0)
        /usr/lib/libSystem.B.dylib (compatibility version 1.0.0, current version 88.3.10)
        /usr/lib/libgcc_s.1.dylib (compatibility version 1.0.0, current version 1.0.0)
        :
これらのスクリプトを援用すれば、適切なユニバーサルバイナリが作成されたか容易に確認しながらビルド&インストールができるようになる。

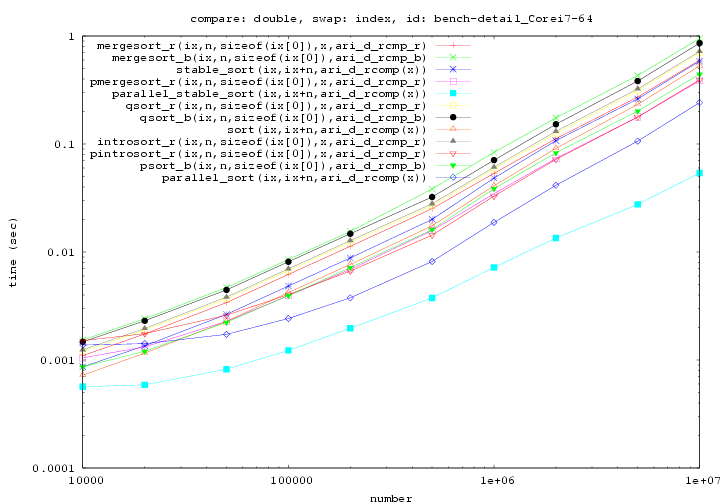
![要素が構造体でそのメンバ [#in6_addr#] が比較対象のソート](upload/1279621777-bench-detail_Corei7-64-10000000-in6-with_in6.png)
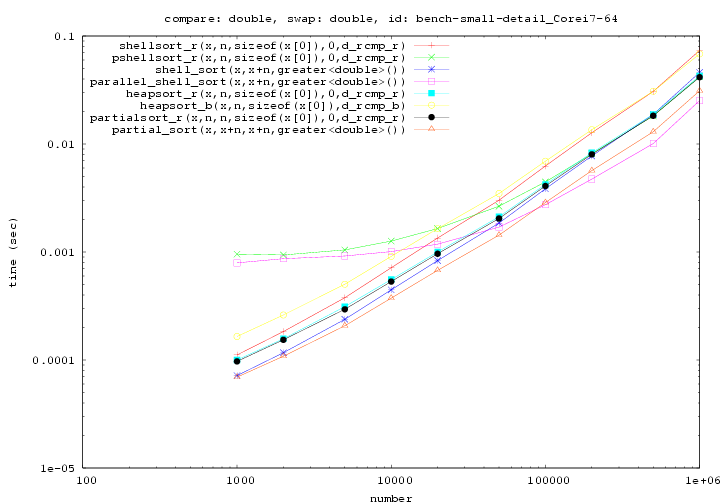
![要素が構造体でそのメンバ [#in6_addr#] が比較対象のソート](upload/1279282063-bench-small-detail_Corei7-64-1000000-in6-with_in6.png)